In the following instructions, we will show you the first steps with the DJI Mini 4 Pro. Everything is explained in simple terms, from the start-up and launch to flying the drone.
To get started with the DJI Mini 4 Pro, only a few simple steps are necessary. After the first start-up of the drone, some of these steps are no longer necessary, which means that you will be able to fly the drone faster in the future.
The start-up consists of the following steps:
- Prepare battery (charge / activate)
- Remove the gimbal protection and stickers
- Unfold the propeller arms
- Install the DJI Fly app
- Prepare remote control
- Activate DJI Mini 4 Pro
- Perform firmware update
- Launch DJI Mini 4 Pro and take off
Prepare Mini 4 Pro battery
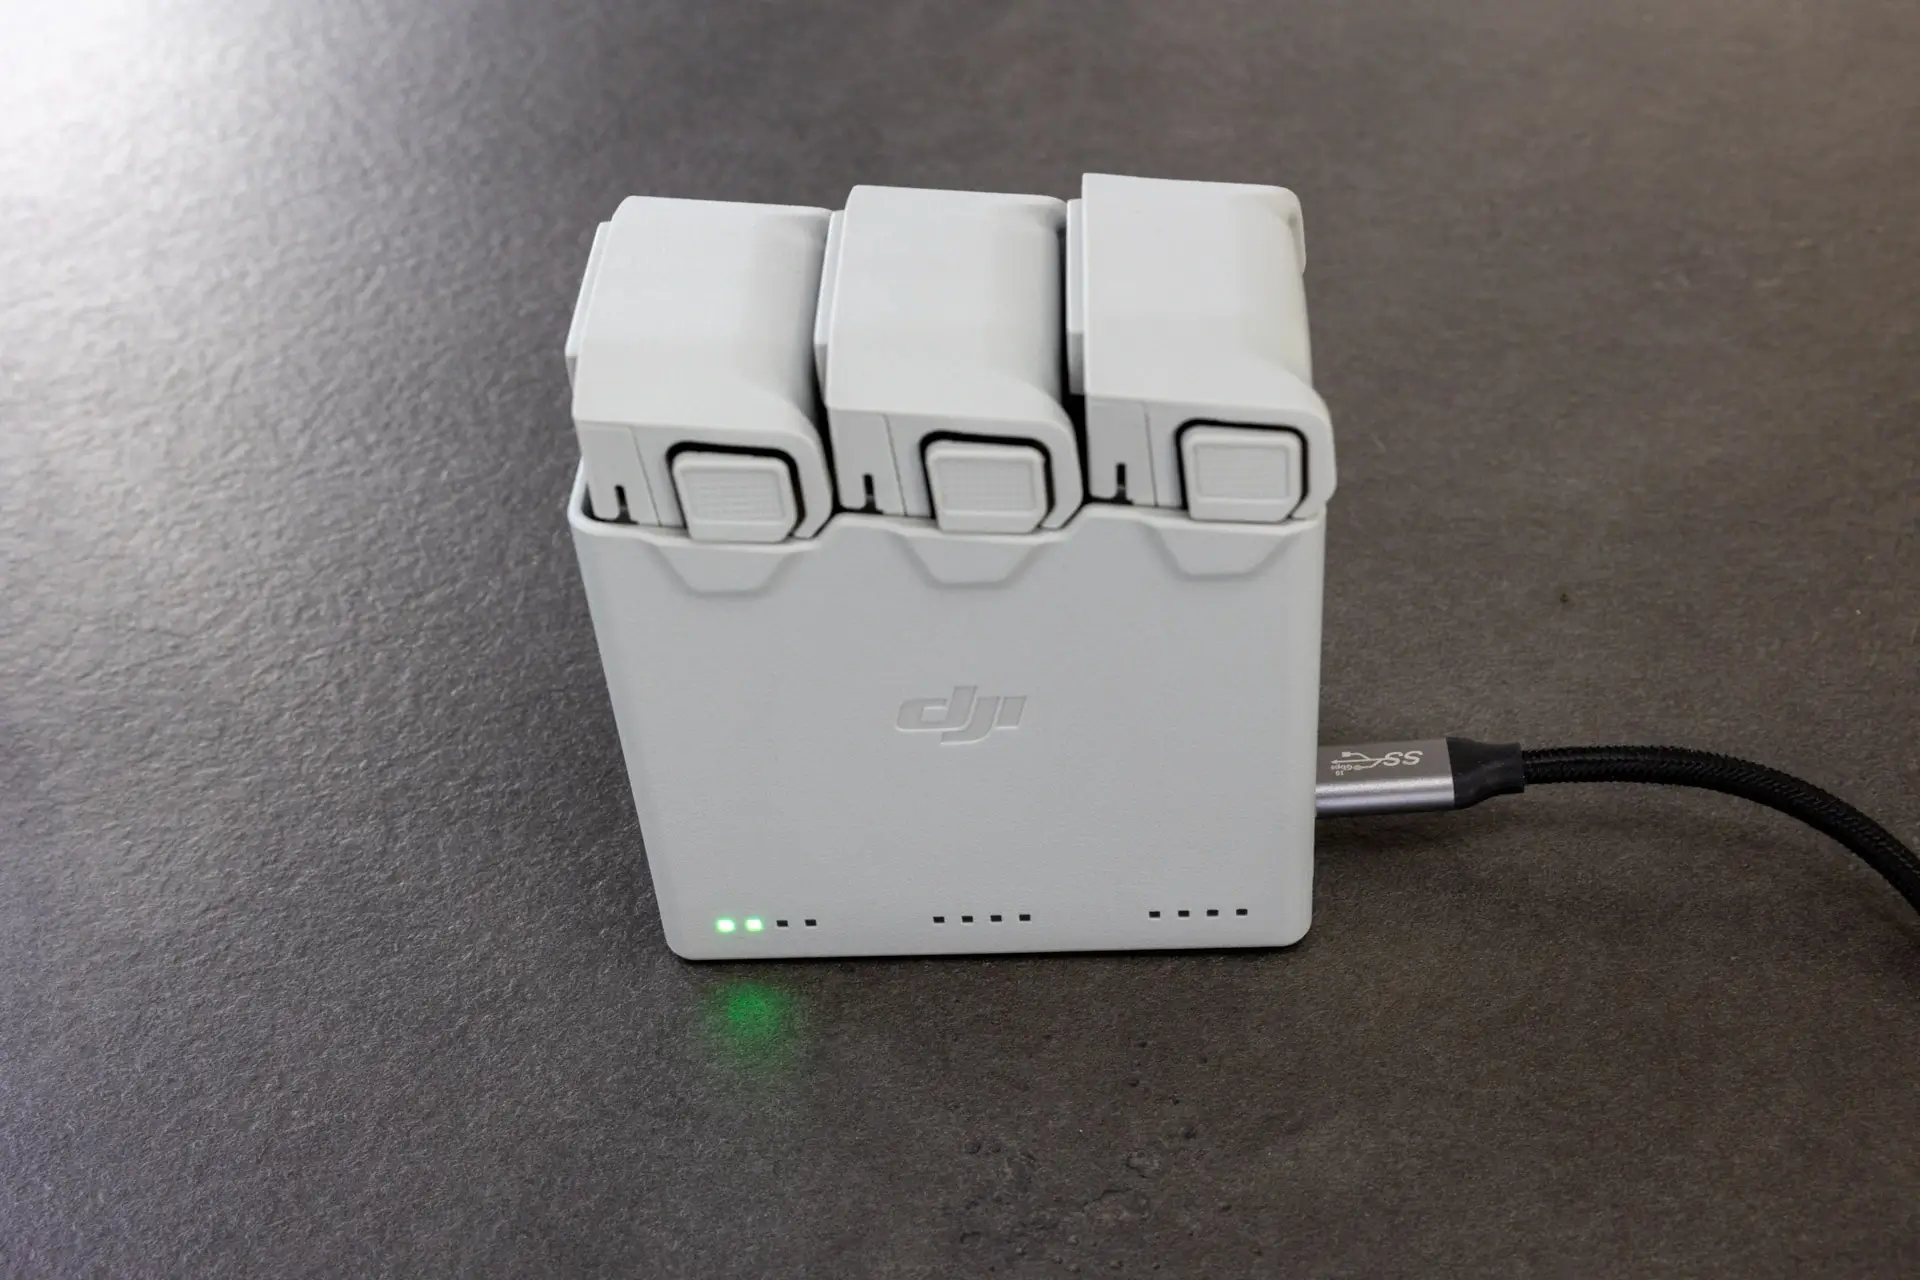
The first step with the DJI Mini 4 Pro is to charge the battery(ies). A battery must first be fully charged. This is because each new battery is shipped in a “sleep mode” and cannot be used until it has been fully charged once. This is to protect the batteries on the often long transport routes.
As with its predecessors, charging the DJI Mini 4 Pro batteries is quite simple. A battery inserted in the drone can be charged directly with a USB-C cable and a USB power adapter without having to be removed. Buyers of the Fly More Combo or owners of the multi-charging station use this to charge the batteries. Keep in mind that the batteries in the station are charged one after the other and not all at once. The LED indicator shows the status of the charging process.
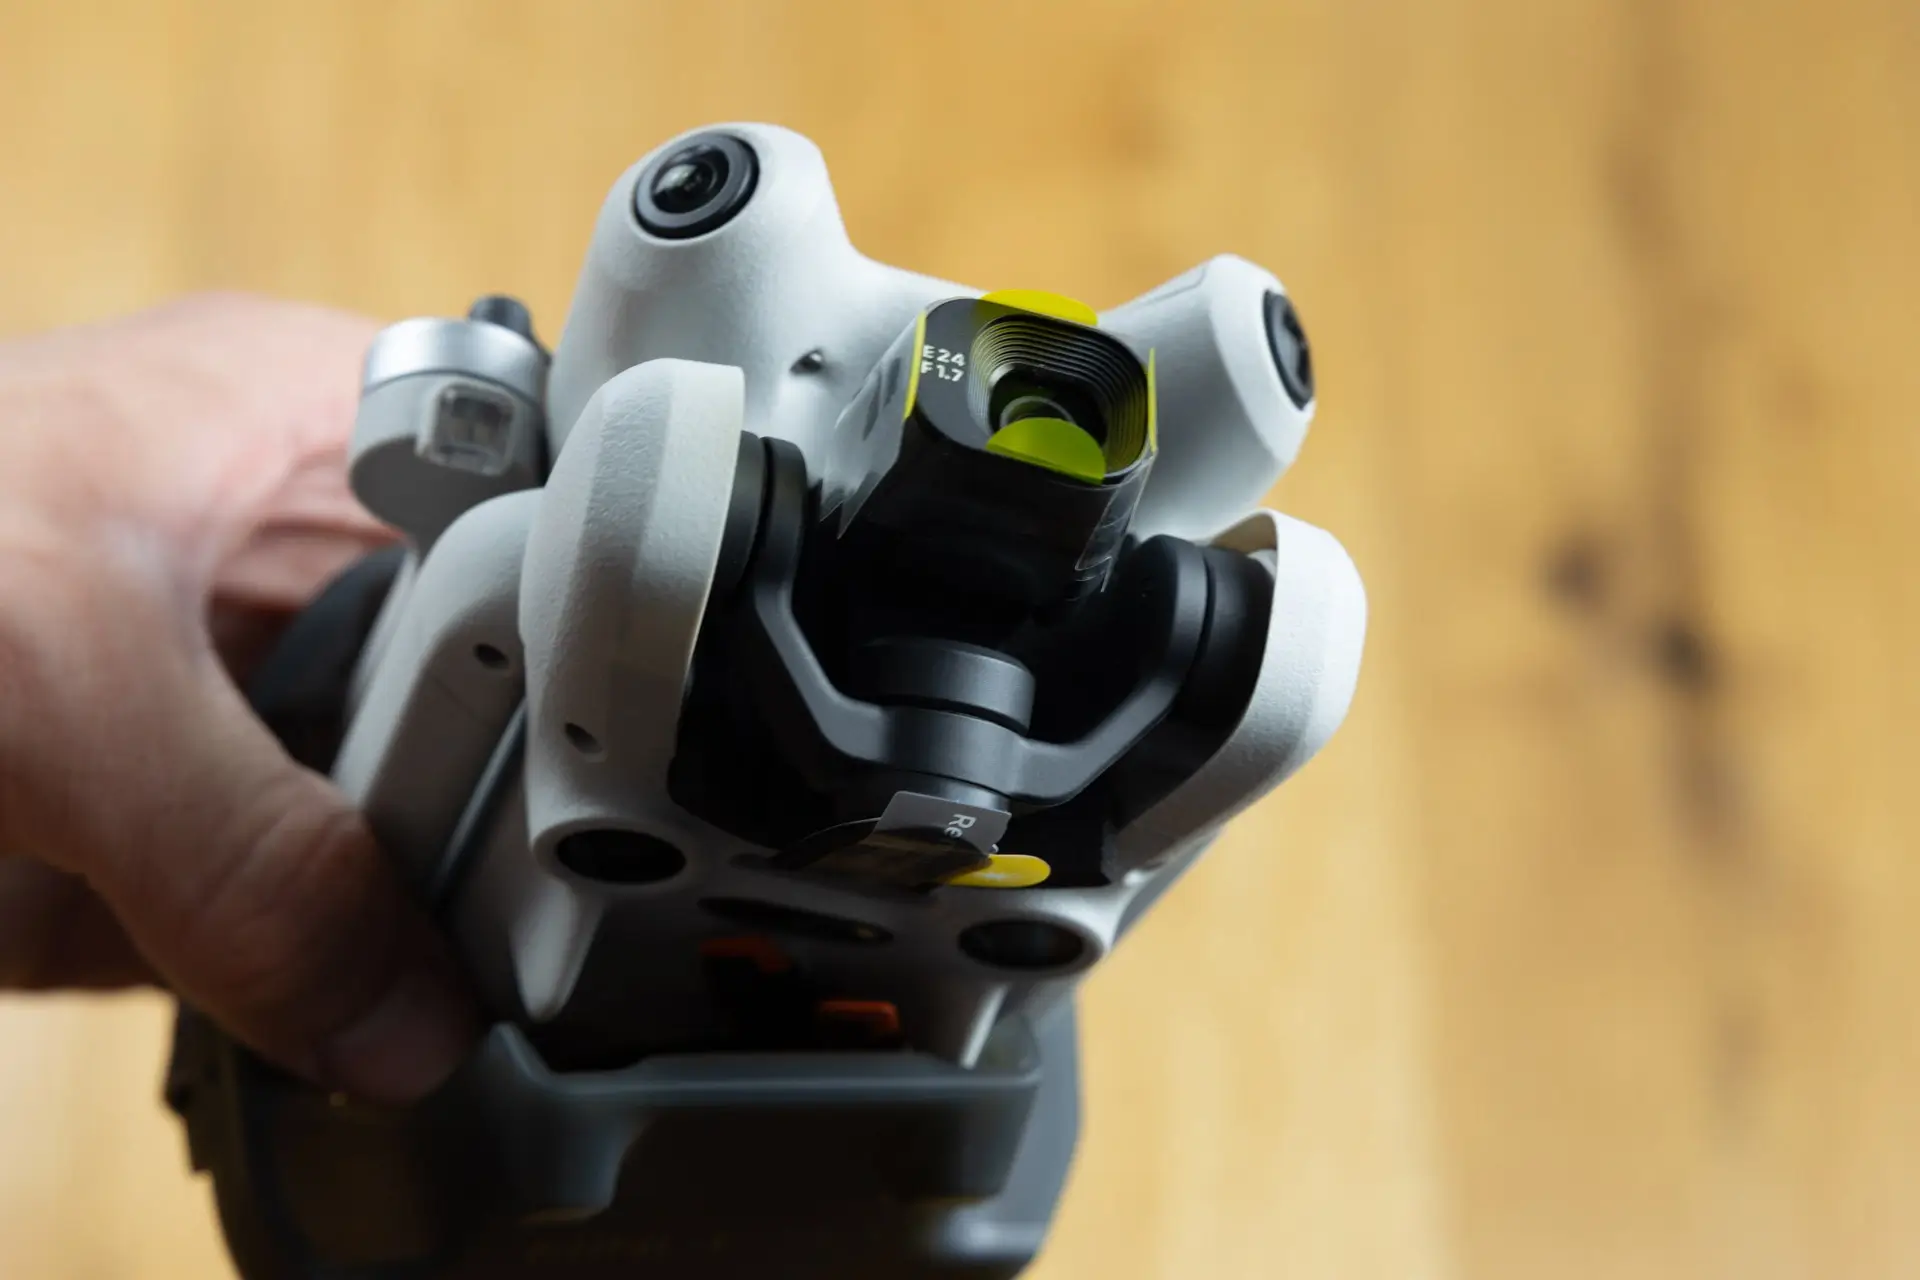
Removing the Gimbal Protector and Sticker
It is very important to remove the gimbal protection before starting the drone. This must only be attached during transport and not when launching the drone, let alone flying it. It fixes the gimbal and thus the camera so that it cannot be damaged during transport. When the drone is launched, however, the gimbal is moved as part of a self-diagnostic process, which can lead to defects in the drone if the gimbal protector is attached.

The numerous stickers can also be removed one by one.
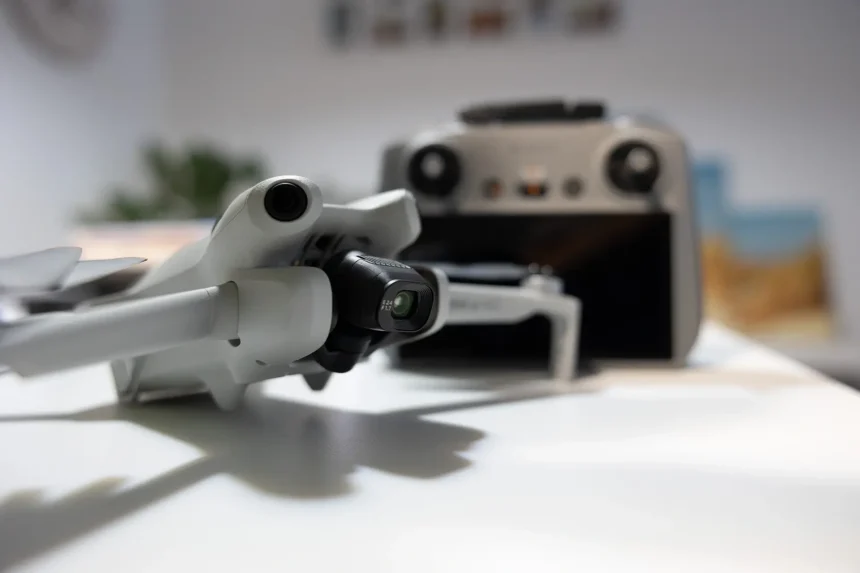
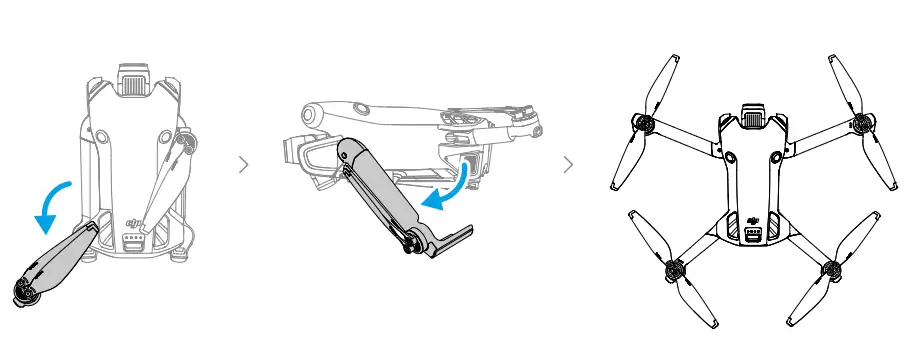
Unfold the propeller arms
Now we can unfold the arms of the drone. The order does not matter with the Mini 4 Pro. This step is also important before launching the drone, because the propellers of the drone are already moved a little automatically when it is switched on. This can be difficult with the arms folded in. In addition, the drone cannot take off this way, of course.
The front arms are folded downwards, while the rear rotor arms are folded backwards.
DJI itself recommends fanning out the propellers before take-off. You can read why in the following article with video: Deploying drone propellers – why you should always do it.
Install the DJI Fly app
To launch, activate and fly the DJI Mini 4 Pro, you need the DJI Fly app. If you are using the DJI RC-2 remote control, the app is already pre-installed. If you are using the DJI RC-N2 remote control, you need to download the app onto your smartphone. You can get the download link for iOS and Android including installation instructions here DJI Fly App – Download and Updates.
Preparing the remote control (DJI RC-2 and DJI RC-N2)
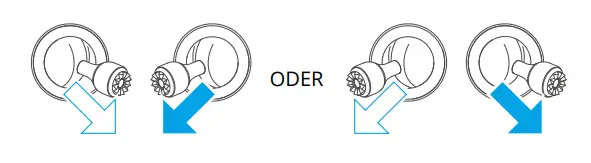
Both remote controls need to be fully charged first, just like the battery of the drone. For both available controllers, remove the control sticks from the back and bottom of the remote control from the compartment and turn them to the two intended positions. This should be done quickly.
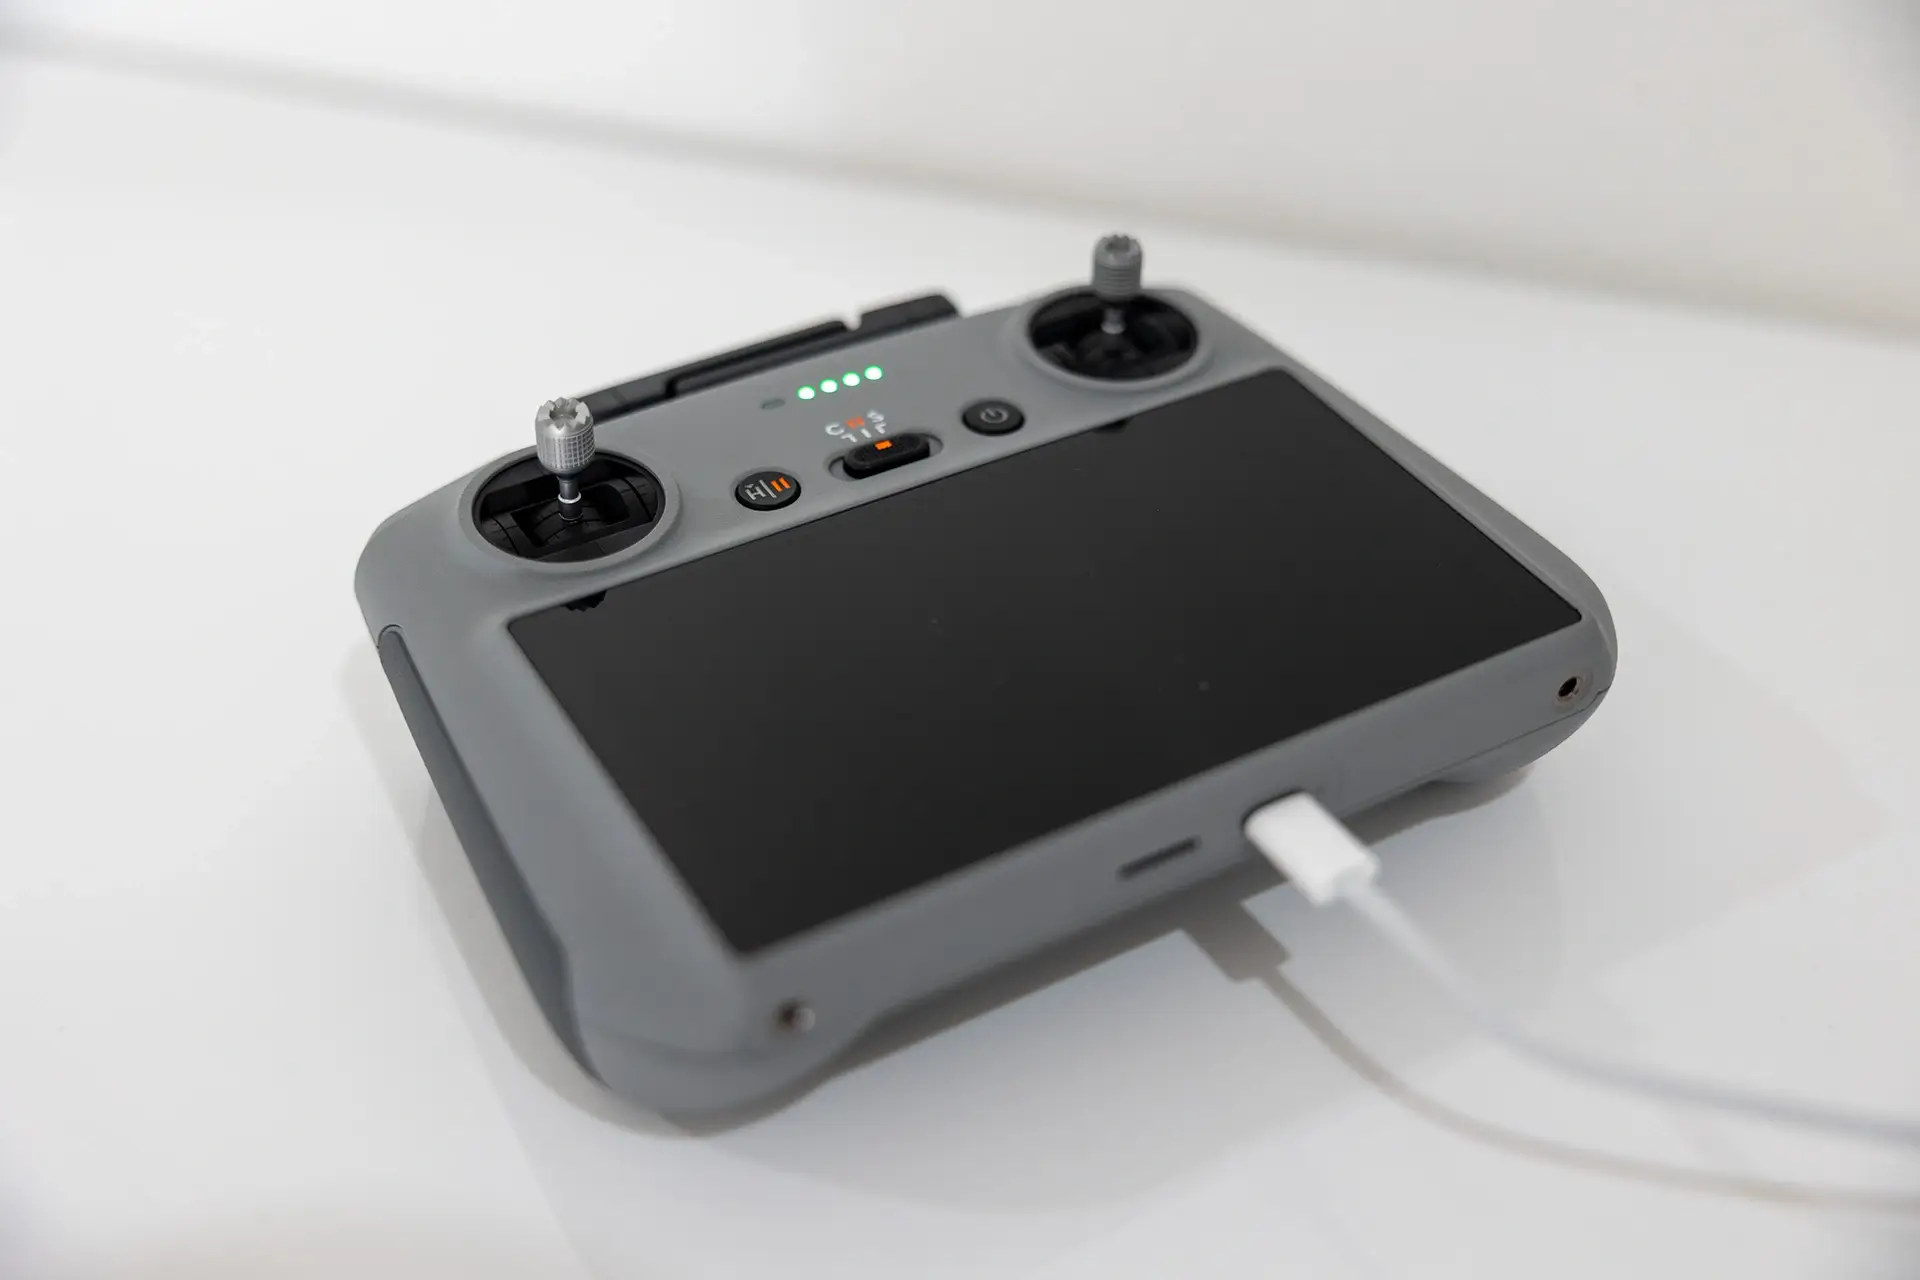
While the RC 2 already uses an integrated display including a pre-installed DJI Fly app, the RC-N2 still requires a smartphone with an installed app to be clamped into the holder provided on the top and connected using the cable provided.
Activate DJI Mini 4 Pro
Once all the steps up to this point have been completed, the drone can be launched. However, before the actual take-off, the activation at DJI and the search for the current firmware must be carried out. New DJI Mini 4 Pro models require at least the first update to be able to access all functions.
We first start the remote control by pressing the power button once, then press it again and hold it down until the remote control starts. With the RC 2 you will now be guided through the remote control setup process where you will also need to activate the remote control itself. This requires an available Wi-Fi network.

The DJI Mini 4 Pro itself is started in the same way. The power button of the DJI Mini 4 Pro is located at the back on the top of the drone. After switching on, the drone goes through a short self-diagnosis test as mentioned.
Once both devices are switched on, the remote control automatically connects to the drone. We also launch the DJI Fly app on the smartphone when using the RC-N2 remote control. Both on the RC 2 and via the Fly App on the smartphone, the first steps necessary to get the drone up and running are now displayed. You can simply follow the instructions strictly.
Within the DJI Fly app, you will now also see firmware updates for the drone and the remote control as well as for the FlySafe database. These updates should be carried out urgently. Firmware updates usually fix problems or add new features. During the update, the drone may turn on and off several times.
If you need more information on how to perform firmware updates, take a look at our guide Performing a DJI Mini 4 Pro Firmware Update.
Launch the DJI Mini 4 Pro and take off
Once these steps have been completed and the drone has been activated and updated, a message will appear in the Fly app. The start-up is now complete. Now you can launch the DJI Mini 4 Pro!
In the Fly app, switch to the drone’s flight mode at the bottom right (the Activate button changes to Fly). Now you can start the motors by pulling both control sticks in and down or out and down.
As soon as the motors are running, gently pull the left stick upwards and the drone will take off. Have fun flying and always pay attention!
First flight exercises with the DJI Mini 4 Pro
If the Mini 4 Pro is your first drone, we strongly recommend you read our article Learn to fly a drone: The ultimate guide for beginners. If you want to improve your flying skills and knowledge, you should also take a look at our selected drone courses. The important thing is not to overestimate your own skills!
Summary
Starting up and launching the DJI Mini 4 Pro is no problem with the help of the manual and pretty self-explanatory. Further details can also be found in the official manual for the DJI Mini 4 Pro.
Before the actual flight, you should also read our article ” Where can I fly with my drone? Another must-have is the currently valid regulations and laws, summarised in the EU Drone Regulation.

- Unter 249 g, kein Drohnenführerschein erforderlich[1] – Leicht, konform mit den C0-Vorschriften, in den meisten Ländern ist keine Drohnenführerschein erforderlich! Genieße den Spaß am Fliegen ohne mühsames Antragsverfahren und Wartezeit
DJI Mini 4 Pro launch FAQ
Switch on the remote control and the drone. Connect the two together. Then move the control sticks inwards and downwards to start the motors. More details can be found in the article.
We have described how you can activate the DJI Mini 4 Pro in the article.
Only a few steps are necessary. Prepare the battery (charge / activate)
Remove the gimbal protection and stickers
Unfold the propeller arms
Install the DJI Fly app
Prepare the remote control
Activate the DJI Mini 4 Pro
Perform the firmware update
Start the DJI Mini 4 Pro and take off
You can find a step-by-step guide in the article itself.
Letzte Aktualisierung am 2024-07-27 / Affiliate Links / Bilder von der Amazon Product Advertising API


Bisher keine Antworten.
Lade neue Antworten
Nimm an der gesamten Diskussion im Drohnen Forum teil →