In addition to creating breathtaking drone images and videos, you should always remember to back up your work properly. Regular backups are a must. We’ll show you how you can create automatic backups under Windows easily and free of charge.
Why do I need backups?
The question of“why” you need backups is actually superfluous and should be obvious to you. Nothing is more annoying than accidentally deleting files. Or lost files after a hardware defect. If you don’t back up your files regularly, you will be extremely annoyed in such a situation. If recordings of current projects are lost, the damage is all the greater.
Many people shy away from the potential effort involved in creating backups or simply forget to do it regularly. However, backups can be automated with little effort and free of charge. Once set up, you don’t have to worry about anything for the most part.
Requirements for a backup
There are differentbackup strategies. In the following, we will follow a simple strategy to set up a quick backup in which local files are backed up from a PC/laptop to an external hard drive. We assume that you have a folder with all your pictures and videos that you would like to back up regularly.
With the tool and instructions presented here, you can of course also set up several folders for backing up.
Backing up to the same hard drive is of course absolutely not recommended. If the hardware fails, not only the originals but also the backups will be lost.
There are countless external hard drives for simple backups. We can recommend the following models, for example

- Amazon Exclusive
- Mit dieser tragbaren Festplatte können Sie Inhalte auf Ihrem Computer ganz einfach unterwegs sichern und schützen. Sie wird automatisch von Windows erkannt.
- Erweiterung der Kapazität Ihres Computers mit einer leichten, kompakten Lösung. Kampatibel mit PC, Notebook, Xbox & PS4 Konsolen
- Amazon Exclusive
- Erweiterung der Kapazität Ihres Computers mit einer leichten, kompakten Lösung. Kampatibel mit PC, Notebook, Xbox und PS4 Konsolen
- Sofortige Plug-and-Play-PC-Kompatibilität; Einfache Drag and Drop Funktionalität
Set up an automatic backup
There are countless solutions for setting up backups, all with their advantages and disadvantages. We will show you one option with the free and widely used SyncBackFree software. We also use SynBackFree to back up our data automatically and have been doing so for years. We can therefore recommend the software with a clear conscience.
Download SyncBackFree
You can download the free software directly from the developer’s website at: https: //www.2brightsparks.com/download-syncbackfree.html
Simply download the programme to the PC on which the files you want to back up are located.
Install SynBackFree
The installation of SyncBackFree is quick and self-explanatory. Simply start the downloaded .exe file and follow the installation process.
Create a new backup profile
SyncBackFree works with profiles. A profile corresponds to a rule set of files that are to be backed up from a defined source to a defined destination.
Several profiles can therefore be created for different folders / files / sources / destinations. For the sake of simplicity, we will limit this guide to one folder as the source and one folder as the destination on an external hard drive. If you want to refine this concept and add exceptions, for example, you will find further links at the end of the article.
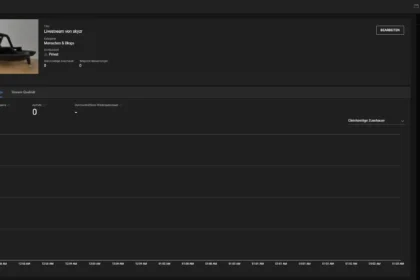
So open SynBackFree and you will be served an empty list (the screenshot already shows a backup profile, which of course does not yet exist for you).
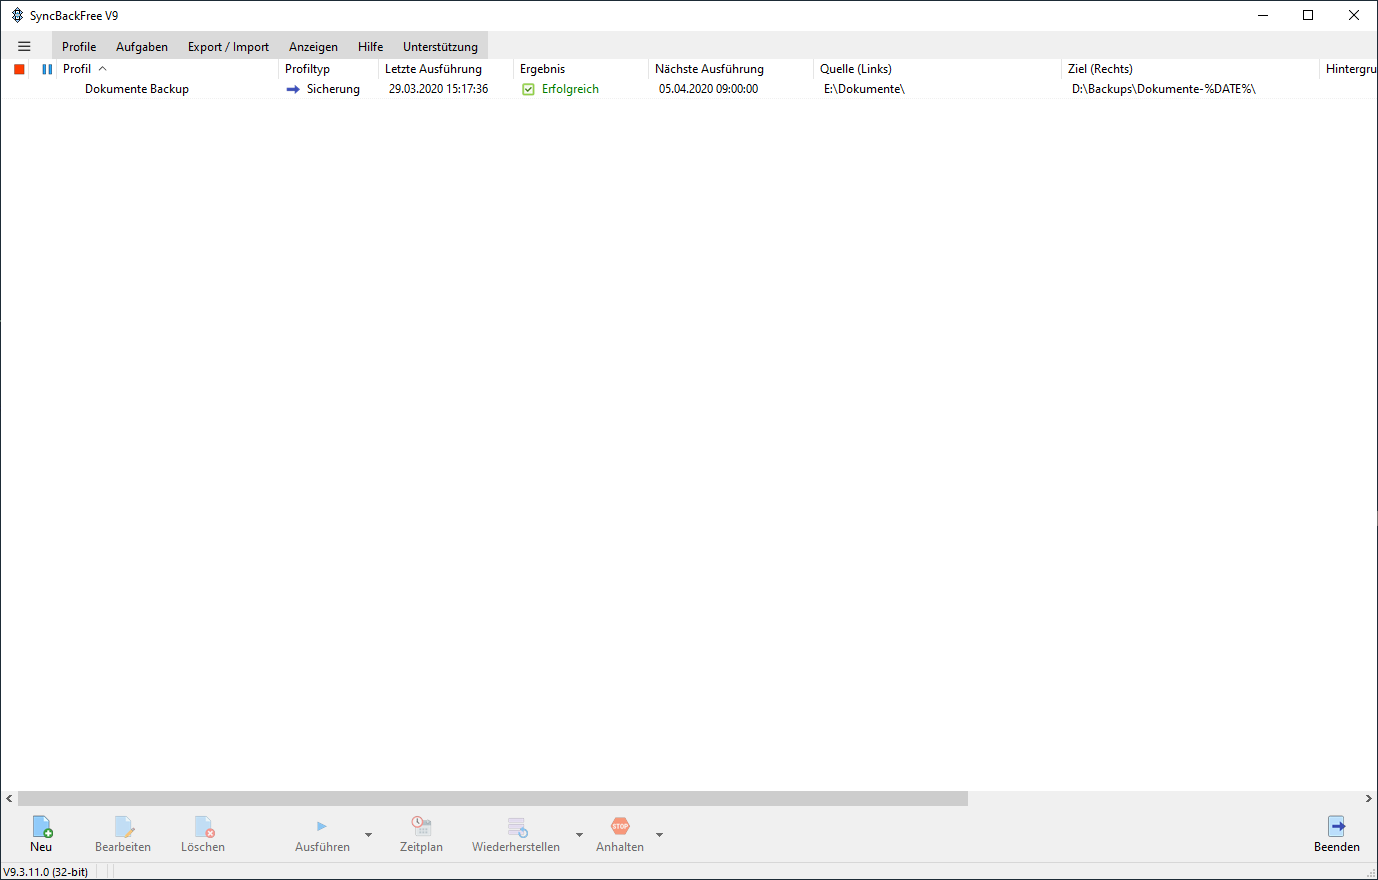
To create a new profile, click on the“New” button at the bottom left.
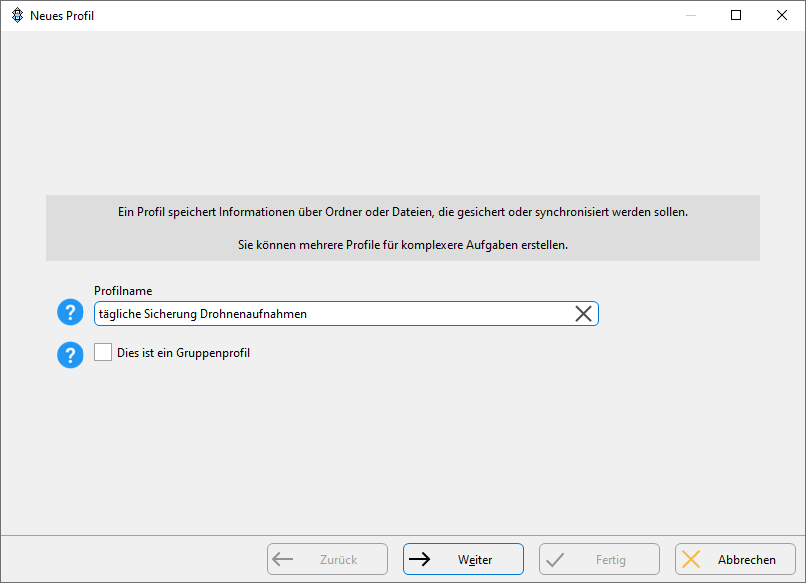
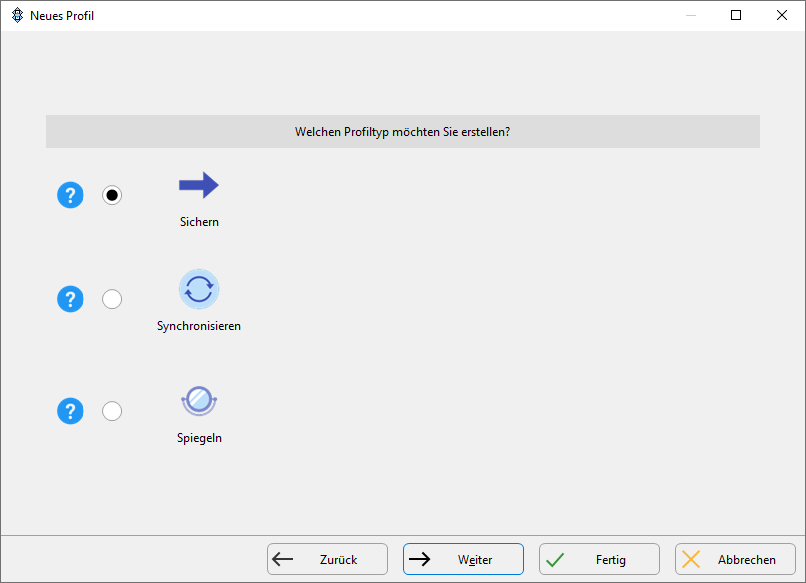
Give the profile a unique name, e.g.“Daily backup drone recordings” and click on“Next“. Under“Profile type“, select“Backup” and click“Next” again.
In the new window with source and destination, leave the settings on both sides set to“Internal/external drive, network path, etc.” because we want to back up internal files to an external hard drive. Click on“Done“. Confirm the dialogue with“Ok“.
You will now see a new window with numerous tabs and submenus. Don’t let this put you off. In these instructions, we will concentrate on the ones that are relevant to us. Once you are more familiar with the software, you can make many more settings and refine backups to suit your needs.
First, you need to define the source, i.e. the files to be backed up, and the destination, i.e. the location where the files are to be saved.
Select the desired folders in the two fields. Here is a small addition: add“\ÚTE%\” to the destination folder. This ensures that a new subfolder with the backup date is created for each day. Why all this? Normally, changed files are copied from the source to the destination and replace the file there. So if you accidentally change a file, it is then automatically copied to the destination and the backup is overwritten there with the new version, you will no longer be able to access the original version later. Therefore, save each backup in a subfolder with the respective date in order to be able to access old versions of a file if necessary.
Again, there are of course many different ways to set up backups. In these instructions, we will focus on a simple solution for which this procedure is completely sufficient.
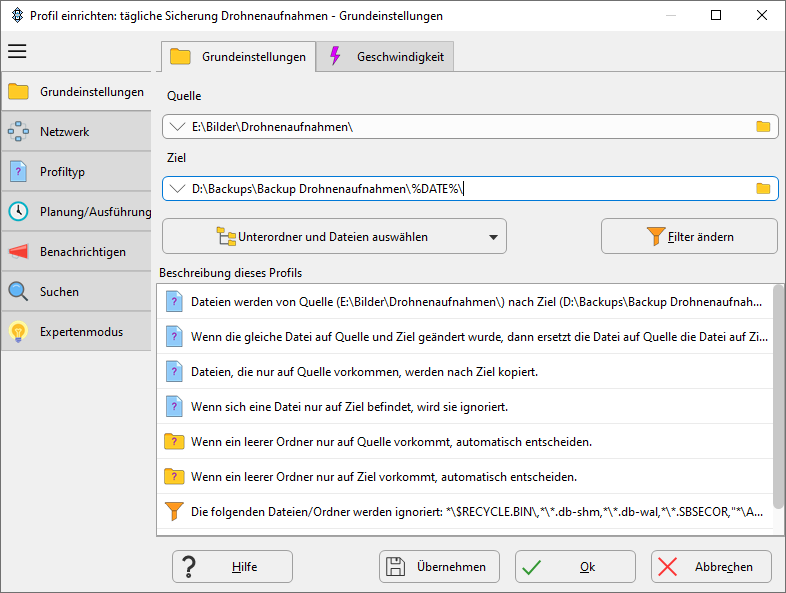
Once you have selected both, you will see a simple description of the profile below. It explains exactly how files are backed up.
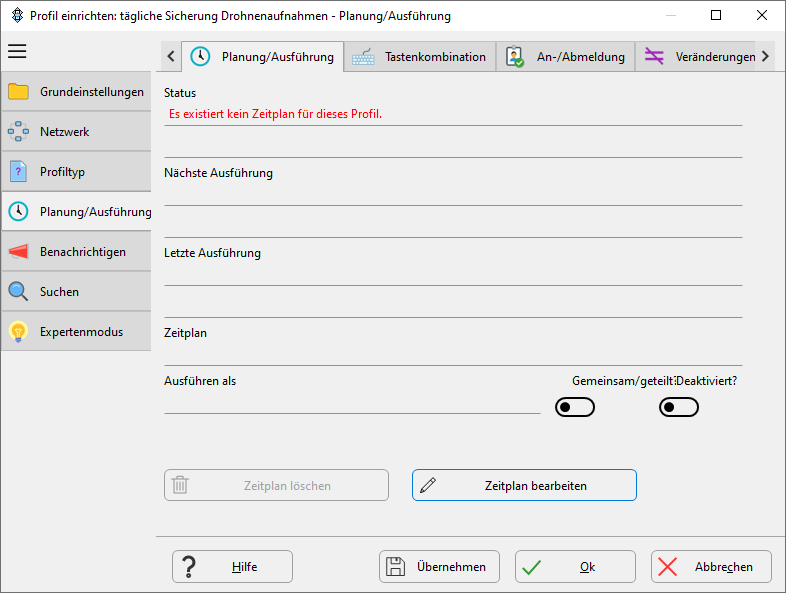
Set up the schedule
The last setting you need to make is to set up a schedule so that backups are performed automatically. This means that you no longer have to remember to start the backup manually, but can rely on it being done automatically at the selected time.
Select the“Planning/execution” tab on the left. Then click on“Edit schedule” in the middle at the bottom and confirm the dialogue that pops up with“Yes“. You may be asked to enter your Windows login password.
We want to set up a daily backup for 12 noon, starting the next day. So leave the date as tomorrow and select“12:00:00” for the time. leave“Repetitions” at“1 day“, which means “every day”.
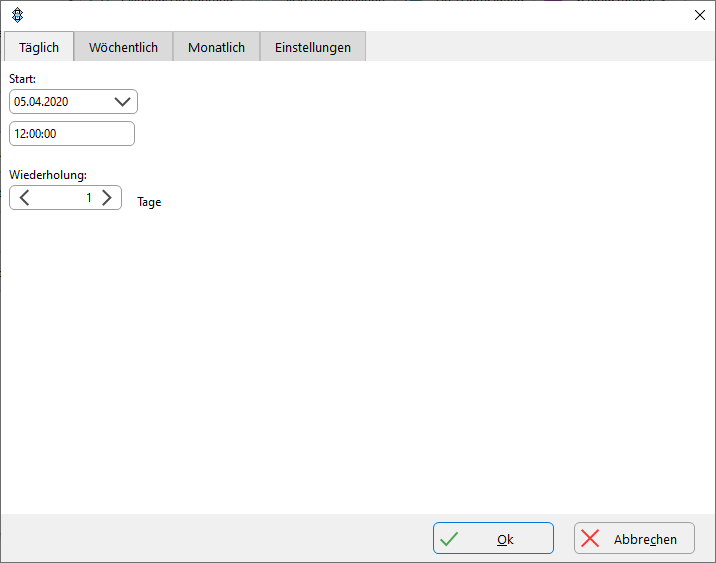
At the top there are further tabs to run the backup weekly or monthly. This can also be done every x days / weeks / months. Here you can decide for yourself how you like it. If you often copy or edit files on your PC, you should consider backing them up every day.
You can make further options for the backup under the“Settings” tab at the top. It is sufficient for a simple backup but to leave the values at the default. However, you should take a quick look at the settings to understand what is being done.
To summarise, the default is: The backup should be executed regardless of whether the current user is logged on or not. The PC should be brought out of sleep mode to perform the backup. If the PC was switched off at the scheduled time, the backup is performed as soon as it is switched on.
Confirm the whole thing below with“Ok“. In the confirmation dialogue, briefly check your settings and click“Ok” again. In the initial screen of the profile, you can leave the other settings as default and click “Ok” again.
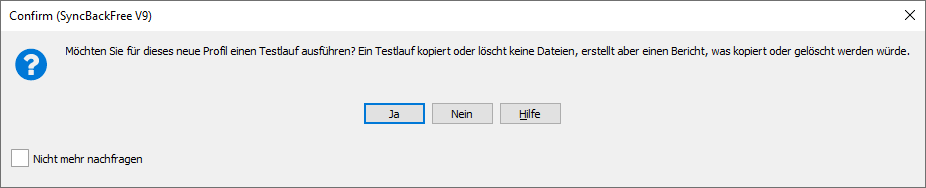
You will now be asked whether you want to start a test run of the backup. This is recommended. No files will be copied yet. SyncBackFree simulates the backup and then displays a message whether everything has worked.
Conclusion
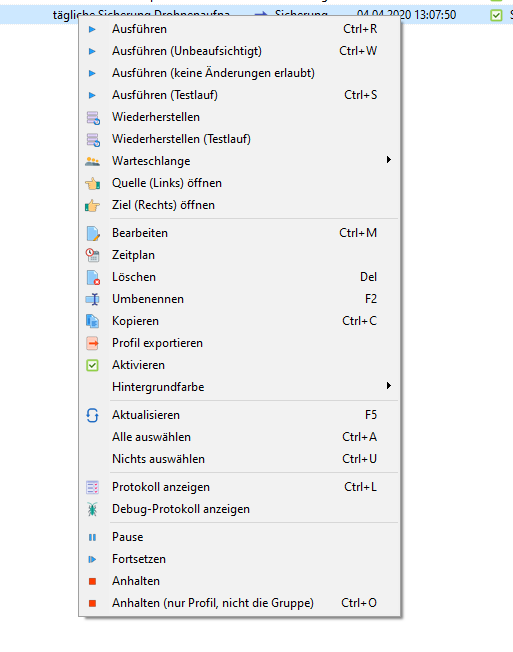
That’s it, your automatic backup is now set up and will start and run automatically every day as you set it up. On the start screen of SyncBackFree, you will see some information for each profile, which you can use to see directly whether everything went as planned or whether errors occurred. You can trigger manual actions by right-clicking on a profile. For example, you can manually start a backup outside of the schedule or you can edit the backup profile again.
If you want to optimise your backups and familiarise yourself with other possible SyncBackFree settings, you should either work your way through the well-explained menus yourself or take a look at the official manual (as of 03/2024).
In addition, a very popular backup strategy is the 3-2-1 variant. If you are familiar with a simple backup according to these instructions, you can also take a look at this variant.
With the help of these instructions, you can now easily create an automatic backup of your important files and no longer have to remember to back up certain files yourself. However, you should check SyncBackFree and your backup directory from time to time to make sure everything is running as desired. Better safe than sorry 🙂
Do you have questions, requests, praise or criticism about the instructions? Do you know better software for backups? Then leave us a comment directly under this message.
Letzte Aktualisierung am 2025-09-18 / Affiliate Links / Bilder von der Amazon Product Advertising API